Saturday, March 19, 2022

Dahlia Days Birthday card

Dahlia Days - Birthday Card

Dahlia Days - Birthday Card

I'm excited to share this card with you today!  I couldn't wait to use the Dahlia Days bundle once I received it.  I fell in love with the lacy background die, and knew I wanted to pair it with a Soft Seafoam
card base.  The card has a bit of a vintage feel, which I love.

Here are the cutting details:

  • Card base: 4 1/4" x 11"
  • Die cut the lacy background from 4 1/4" x 5 1/2" cardstock.  Apply adhesive sheet prior to cutting
  • Inner message layer: 4" x 5 1/4"
  • Scrap for stamping and die cutting the flowers, foliage and sentiment. Sentiment was cut using the Stitched Rectangles dies
I hope you are inspired to use the Dahlia Days bundle to create your own beautiful cards.

Monday, March 14, 2022

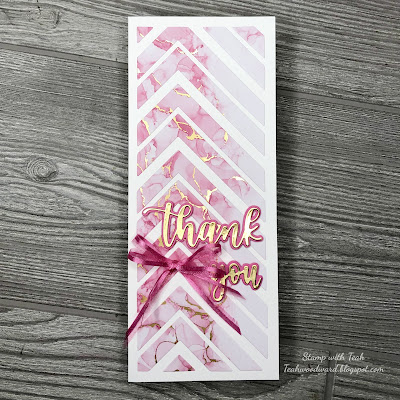
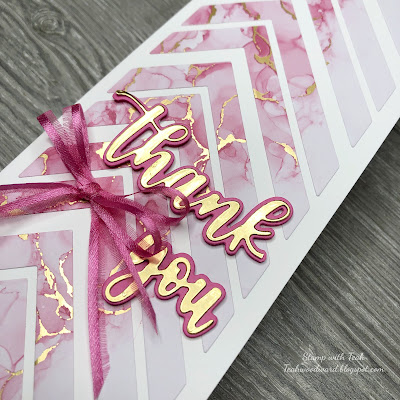
Slim Card Dies - thank you Card


Slim Card Dies

Amazing Thanks Dies


Today I am participating in Bruno and Kylie Bertucci's Demonstrator Training Program Blog Hop.  We are a group of demonstrators that are working through a training program to grow our businesses.  I hope you will take some time to be inspired by clicking on the links to each of the blogs listed below.

You will find the product links for my project at the end of this post.

Cutting instructions:

  • Cardbase: 7" x 8 1/2", scored at 3 1/3"
  • Card front: 3 1/2" x 8 1/2"
  • DSP for card front design ( I used the negative space as a template to adhere the die cut paper in place, then removed the template)
  • 2 layer greeting die cut from the Amazing Thanks Dies
  • DSP: 2 pcs - 3 3/8" x 3/4" adhered to inner card at top and bottom
Blog Hop Links


Thank you for visiting my blog today!

Hugs,

Teah

Product List

Monday, March 7, 2022

Waves of the Ocean - friendship card


Waves of the Ocean - Sunset

Waves of the Ocean - Waves detail

Waves of the Ocean - detail view

During my facebook live today, I demonstrated the Stampin' Up!® Waves of the Ocean collection.  I had so much fun creating this card to share with you.

Here are the cutting details:

  • Night of Navy Cardbase: 4 1/4" x 11", scored at 5 1/2"
  • Coastal Cabana matte layers inner and outer: 4" x 5 1/4"
  • DSP front layer: 3 7/8" x 5 1/8"
  • Basic White inner message layer: 3 7/8" x 5 1/8"
  • Basic white for heat embossing: 3" x 5 1/2"
  • Coastal Cabana foil: 3" x 5 1/2"
  • Basic White scrap for sentiment and Pelican
  • Night of Navy scrap for die cut birds

Here is the order of process:

  • Use blending brush to apply Flirty Flamingo ink to sky area
  • Use blending brush to apply Coastal Cabana ink to sea area
  • Using Stamparatus, stamp wave with Night of Navy to card front.
  • Apply Versamark ink to Basic White cardstock, then apply clear embossing powder and set with heat tool. - see video
  • Apply adhesive sheet to back of Basic White heat embossed cardstock, and to back of foil cardstock.
  • Die cut both wave layers.  Apply to card front
  • Stamp birds in sky
  • Adhere card front to matte layer.
  • Apply matte card front to cardbase using dimensionals.
  • Stamp Pelican and use Blender pen to "color in". Die cut.  Apply with dimensionals
  • Stamp sentiment.  Die cut.  Apply with dimensionals
  • Die cut birds with adhesive sheet on back of cardstock.  Apply to card front
  • Using Stamparatus, stamp wave to inner card message layer using Coastal Cabana (stamping off once first).
  • Stamp birds on inner message layer
  • Adhere message inner message layer to inner matte.  Adhere to inner card
  • Apply gems.
The YouTube tutorial


Thank you for visiting my blog today.
Hugs,
Teah 

Product List

Phrases & Frames with Nature's Symphony

  Phrases & Frames Bundle + Nature's Symphony Bundle This weeks Monochromatic Insta Hop color is all about Petal Pink!  To show off ...