 |
| Enduring Beauty |
 |
| March challenge is a color challenge |
 |
| Enduring Beauty-detail view |
 |
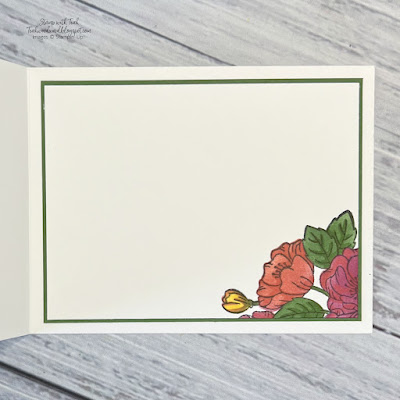
| Enduring Beauty - inner view |
I seriously enjoy color challenges! So there was no question about joining this Crafty Challenge Blog Hop when I saw the color challenge theme!
I decided to combine the Enduring Beauty bundle with the Gorgeous Gardens die to carry those Garden Green leaves across the card front. You will find all the product details at the end of this post.
Cutting instructions:
- Card Base - Basic White Thick: 4 1/4" x 11", scored at 5 1/2". This is a side fold card.
- Front matte layer - Garden Green: 4" x 5 1/4"
- Card front layer - Basic White: 3 7/8" x 5 1/8"
- Gorgeous Garden card front layer - Garden Green: 3 7/8" x 5 1/8". Apply Adhesive sheet to the back of this cardstock prior to die cutting.
- Floral focal point - Basic White: 4" x 5" Stamp and die cut silhouette.
- Flower buds - Flirty Flamingo: scrap to detail die cut 3 small flower buds
- Sentiment - Basic White: 3" x 1 1/2", die cut label
- Inner matte layer- Garden Green: 4" x 5 1/4"
- Inner message liner - Basic White: 3 7/8" x 5 1/8"
Assembly instructions:
- Apply Gorgeous Garden die cut to card front. Trim any overhang as necessary. Adhere to front matte layer. Adhere to front of card base.
- Using Tuxedo Black ink, stamp floral image.
- Line up Enduring Beauty Mask #1 with the flowers. Using blending brushes, I applied Berry Burst to the 3 largest flowers and Calypso Coral to the 2 medium sized flowers.
- Line up Enduring Beauty Mask #2 with the leaves. Using blending brushes, I applied Crushed Curry to the 3 flower buds and Garden Green to the leaves.
- Line up Enduring Beauty Mask #3 with the flowers. Using a blending brush, I applied Flirty Flamingo to all of the flowers.
- Line up Enduring Beauty Mask #4 with the leaves. Using a blending brush, I applied Flirty Flamingo to the 3 flower buds and another layer of Garden Green on the leaves.
- Cut out the floral image using the coordinating die.
- Adhere 3 Flirty Flamingo detail die cuts behind the 3 flower buds.
- Adhere floral focal point to card front using dimensionals.
- Using Tuxedo Black ink, stamp sentiment. Die cut using lable die. Adhere to card front using dimensionals.
- Adhere Linen Thread double bow to card front.
- Scatter Adhesive Backed Sequins to card front
- Using Tuxedo Black ink, stamp partial floral image in one corner of message liner. Apply ink colors to match the card front (this will depend on which flowers you have selected to stamp).
- Adhere message liner to inner matte layer. Adhere to inner card base.
Be sure to check out everyone's projects using this beautiful color combination:
Thank you for visiting my blog today!
Hugs,
Teah


Love your card and great job on coloring the enduring Beauty stamp set and masks. They are so much fun to play with.
ReplyDeleteThanks Marilyn! I really enjoy this set a lot! Hugs
DeleteLovely card Teah, this bundle is such fun to work with x
ReplyDeleteThanks Mo! I love this bundle! Hugs
DeleteI love the background you used under the stamped image. So pretty
ReplyDelete