 |
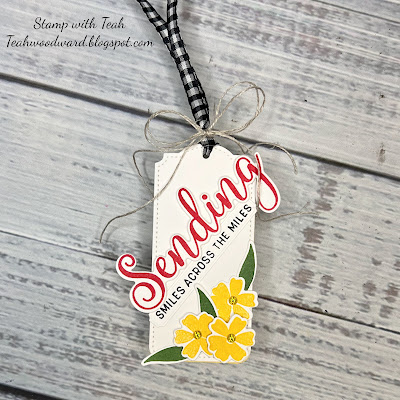
| Sending Smiles Gift Tag |
 |
| Sending Smiles Gift Tag - detail view |
 |
| Sending Smiles Gift Tag - back view |
I've had a love affair with paper and ribbon my entire life. Wrapping packages is just as important to me as what is inside. A friend and I have been putting together some gift baskets and we are down to the finishing touches! I had so much fun making this tag! AND GUESS WHAT?!?!?!?! The entire tag is made out of scraps from my scrap bin. I didn't cut into one piece of paper to create this tag.
I really love how this tag turned out. Not only because it is personalized to the situation, but because it feels good in my hand. It is definitely going to top off the baskets perfectly.
Cutting instructions:
- Scrap of Basic White to die cut largest size of the Tailor Made Tags dies.
- Scrap of Daffodil Delight to die cut largest size of the Tailor Made Tags dies.
- Scrap of Basic White to stamp and die cut sentiment + die cut 1 extra sentiment outline, 3 flowers, 3 leaves.
- 16" of Gingham Ribbon
- 16" x 2 of Linen Thread
- Adhere the 2 die cut Tailor Made Tags to eachother.
- Stamp and die cut "Sending" in Poppy Parade. + Die cut one extra outline. Adhere the 2 together. Adhere to front of tag using dimensionals
- Stamp additional sentiment in Tuxedo Black ink. Die cut. Adhere below "Sending".
- Stamp 3 flowers in Daffodil Delight ink. Die cut. Arrange in lower right corner. 1 will be adhered flat with glue. 1 will be adhered with 1 dimensional. Last will be adhered with 2 stacked dimensionals.
- Stamp 3 leaves in Garden Green ink. Die cut. Arrange in flowers
- Loop Gingham ribbon through hole. Tie double bow with Linen Thread at base of ribbon.
- Add glossy dots to flower centers


No comments:
Post a Comment