 |
| Circle Sayings bundle - Birthday card |
 |
| Circle Sayings Birthday card - detail view |
 |
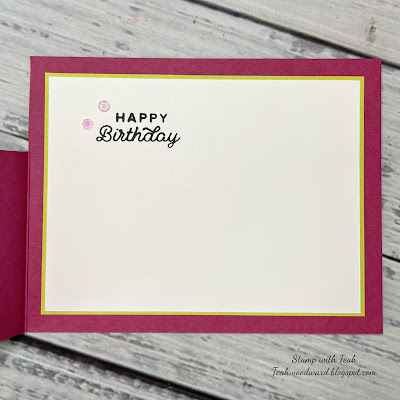
| Circle Sayings Birthday card - inner view |
When Stampin' Up!® announced the new (and returning) colors, I instantly fell in love with Lemon Lime Twist and Berry Burst together. I couldn't wait to use them together! I created this card to add to each of my catalog packets for my customers. Sometimes, you just want to see the actual paper and ink in action. I love this light-hearted card design. The fold is a "stable door" fold.
I am writing this blog post prior to the new catalog release so the following items don't have links yet. They will be available starting May 2nd.
Circle Sayings Bundle (stamps and punch set): 161355
Berry Burst Cardstock:144243
Berry Burst ink pad: 147143
Berry Burst Stampin' Blends Combo Pack: 161681
Lemon Lime Twist cardstock: 144245
Lemon Lime Twist ink pad:147145
Lemon Lime Twist Stampin' Blends Combo Pack: 161682
Cutting Instructions:
- Berry Burst card base: 4 1/4" x 11", scored at 5 1/2". This is a side fold card. The front of the card base, will have the top 1 1/4" x 5 1/2" cut off. This leaves the bottom of the card front to create the "stable door" front flap.
- Lemon Lime Twist card front: 2 1/4" x 5". This piece will be die cut with the Dots and Spots die
- Basic Black zig zag: 5" x 5/8", die cut with zig zag, then run through a 2nd time with a 3/8" space.
- Lemon Lime Twist inner matte layer: 3 3/4" x 5"
- Basic White inner message liner: 3 5/8' X 4 7/8"
- Basic Black die cut 2nd largest circle from Stylish Shapes Dies to matte the sentiment
- Scrap of Basic White to punch 2 3/8" circle
Assembly Instructions:
- Adhere Lemon Lime Twist layer to front of "stable door" card front
- Adhere Basic Black zig zag to top of "stable door"
- Stamp "Celebrate" circle on Basic White scrap. Stamp cupcake in middle of "celebrate" circle. Color cupcake with Stampin' Blends. Punch out circle.
- Adhere stamped Basic White circle to Basic Black matte circle. Adhere to right side of "stable door" using Stampin' Dimensionals on lower half of circle only.
- Stamp sentiment on left side of message liner so that it shows above the "stable door".
- Adhere message liner to inner matte layer. Adhere to inner card base.
- Apply Pastel Adhesive Backed Sequins to card front and next to inner sentiment.
- Stamp one cupcake to lower left front of envelope. Stamp 3 cupcakes on back flap of envelope.
I hope you enjoy this bright and cheery card as much as I do!
Thank you for visiting my blog today.
Hugs,
Teah


No comments:
Post a Comment