Monday, May 27, 2024

Citrus Blooms - Hello


Citrus Blooms collections


May Sketch challenge

Citrus Blooms Collections - detail view

Citrus Blooms - inner view

I love a good sketch challenge.  They make me look at my supplies in new forms of combinations.   Today I am participating in a sketch challenge with the Crafty Collaborations Team for the May Crafty Challenge Blog Hop.  I have chosen to use the Mediterranean Blooms Collection for my card.  I'm so happy with how this turned out.  I hope you will give this sketch a try too!

Below you will find the list of participants for today's blog hop.  We would love for you to visit everyones blogs, to see what everyone did with this sketch.  Just click on the live live links in the list.

Cutting instructions:
  • Card base - Basic White: 5 1/2" x 8 1/2", scored at  4 1/4", this is a side fold card.
  • Matte layer #1 - Night of Navy: 3 1/4 H x 4 1/4" W
  • DSP layer #1 - DSP: 3 1/8" H x 4 1/8" W
  • Banner matte layer - Night of Navy: 5 3/8" H x 2 1/4" W
  • Banner DSP layer - DSP: 5 1/4" H x 2 1/8" W
  • Focal point - DSP: Die cut from DSP
  • Sentiment - Basic White: 1/2" x 1 1/4"
  • Inner matte layer - Night of Navy: 3 7/8" x 5 1/8"
  • Inner message liner - Basic White: 3 3/4" x 5"
  • Inner deco strip - DSP: 3/8" x 5"
  • Linen Thread: 16"
Assembly:
  • Using bone folder, burnish fold line.
  • Adhere DSP layer #1 to matte layer #1.  Adhere to front of card base.
  • Measure up 1/2" at center of banner matte layer, and cut from corners to the half in mark to create the banner edge.
  • Measure up 1/2" at center of Banner DSP layer, and cut from corners to the half in mark to create the banner edge. Adhere to banner matte layer.  Adhere to card front using dimensionals.
  • Adhere focal point DSP using dimensionals.
  • Using Night of Navy ink, stamp sentiment.  Trim ends of strip at an angle.  Adhere to card front using dimensionals.
  • Adhere linen thread double bow using a mini glue dot.
  • Scatter gems on card front.
  • Adhere DSP deco strip on inner message liner.  Adhere to inner matte layer.  Adhere to inner card base.
Let's visit every one else's blogs now!

Thank you for visiting my blog today!
Hugs,
Teah

Product List

Thursday, May 23, 2024

Friends for Life - Thinking of You

Friends for Life


May 2024 color challenge


Thinking of You detail view

Friends for Life inner view

Today I am participating in the Ink and Inspiration Blog Hop color challenge.  I chose to use the new Friends for Life bundle for my card design.  

I've been out of town and really didn't allow myself enough time to plan my card design.  I am grateful for bundles like Friends for Life that make designing a quick card very easy.  The hardest part was planning my colors for the challenge.

Cutting instructions:
  • Card Base: 4 1/4" x 11", scored at 5 1/2".  This is a top fold card.
  • Front matte layer: 4 1/8" x 5 3/8"
  • Card front layer: 4" x 5 1/4"
  • Inner matte layer: 4" x 5 1/4" 
  • Inner message liner: 3 7/8" x 5 1/8"
Lets check out everyone else's designs by visiting each of their blogs.

Thank you for visiting my blog today.

Hugs,
Teah

Product List

Thursday, May 9, 2024

Attention Shoppers - Happy Birthday

Attention Shoppers


Attention Shopper - detail view

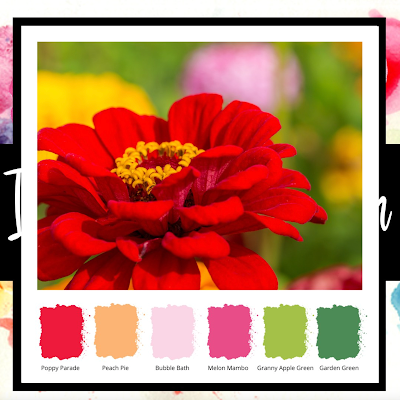
Today's Stampin' Dreams Blog Hop theme is "In Colors".  So I chose the lovely new 2024-2026 In Colors!
Below you will find a list of blogs to explore to see how everyone else decided to fulfill the In colors theme.

I chose the new Attention shoppers bundle to design my card.  So festive and whimsical!  You will find the list of products at the end of the post.

Cutting instructions:
  • Card Base: 5 1/2" x 8 1/2", scored at 4 1/4".  This is a top fold card.
  • Front matte layer: 2nd largest Perennial Postage die
  • Card front layer: 2 7/8" x 4 1/8"
  • Bottles: scrap to stamp and die cut 2 
  • Flowers: scrap to stamp and die cut 1
  • Leaves: scrap to stamp and die cut 3 plants (the pots will be trimmed off)
  • Ribbon: 16"
  • Inner matte layer: 4 3/4" x 3 1/2"
  • Message liner: 2nd larges Perennial Postage die
Assembly instructions:
  • Burnish fold line using bone folder.
  • Using Light Summer Splash Stampin' Blends cap, flick tip of pen to spatter ink on front of card base and card front.
  • Using Tuxedo Black ink, stamp sentiment on lower right card front.
  • Adhere cardbase to front matte layer.  Wrap ribbon around center, attaching ends using tape on back.  
  • Color leaves using Shy Shammrock Stampin' Blends.  Die cut.  Trim off plant pot.
  • Color flowers using Petunia Pop, Pretty in Pink and Summer Splash Stampin' Blends.  Die cut.
  • Color bottles using Shy Shammrock and Peach Pie.  Die cut.
  • Arrange and adhere die cuts.  I used dimensionals on the flowers.
  • Tie bow on ribbon.
  • Adhere matted card front to front of card base using dimensionals.
  • Scatter gems.
  • Using Light Summer Splash Stampin' Blends cap, flick tip of pen to spatter ink on inner message liner.
  • Using Tuxedo Black ink, stamp sentiment on inner message liner.
  • Adhere message liner to inner matte layer.  Adhere to inner card base.
Let's take a look at those other blog posts using In Colors!

Thank you for visiting my blog today!
Hugs,
Teah

Product List

Decorative Trees - Seasons Greetings

  Decorative Trees Today I am contributing to the Crafty Collaborations Share it Sunday Blog Hop.  I had some fun using the Decorative Trees...